Time Capsule
How to Create a Photo Collage Storytelling Wall for Your Home
How to Create a Photo Collage Storytelling Wall for Your Home
Many times when my husband and I have gone to a Trade Show displaying our decorative and unique Baby and Wedding Time Capsules, many people ask how we made our backdrop for our display. You know it is funny, when you start your own business; you are limited on funds, and have to become creative. Sometimes, your creative project turns out better than something you would have paid for somewhere.
The Photo Collage DIY Project Step-by-Step
This beautiful piece of art and love, is really easy to make, it is just time consuming. This can also be a family bonding project to put together, for fun. So let you children join in and celebrate or relive your past moments of happiness together. This is exactly what we encourage families to do when they purchase our Baby or Wedding Time Capsules.
Materials Needed:
– Four Panel Room Divider or Folding Screen
– General Purpose Spray Adhesive
– Photo Printer Paper
– Color Photo Printer
– Foam Stencil Letters
– Your Favorite Spray Paint Color for the Stencil Letters
1. Purchase a Four Panel Room Divider or Folding Screen, for example the one see on Amazon at http://www.amazon.com/International-R566-4-4-Panel-Room-Divider/dp/B000YJ9VYI for 33.00 currently, or as of 4-24-14.
2. Reminisce, going through all your photos saved on your computer. Have your friends and family even send some of their own photos to use in your collage wall.
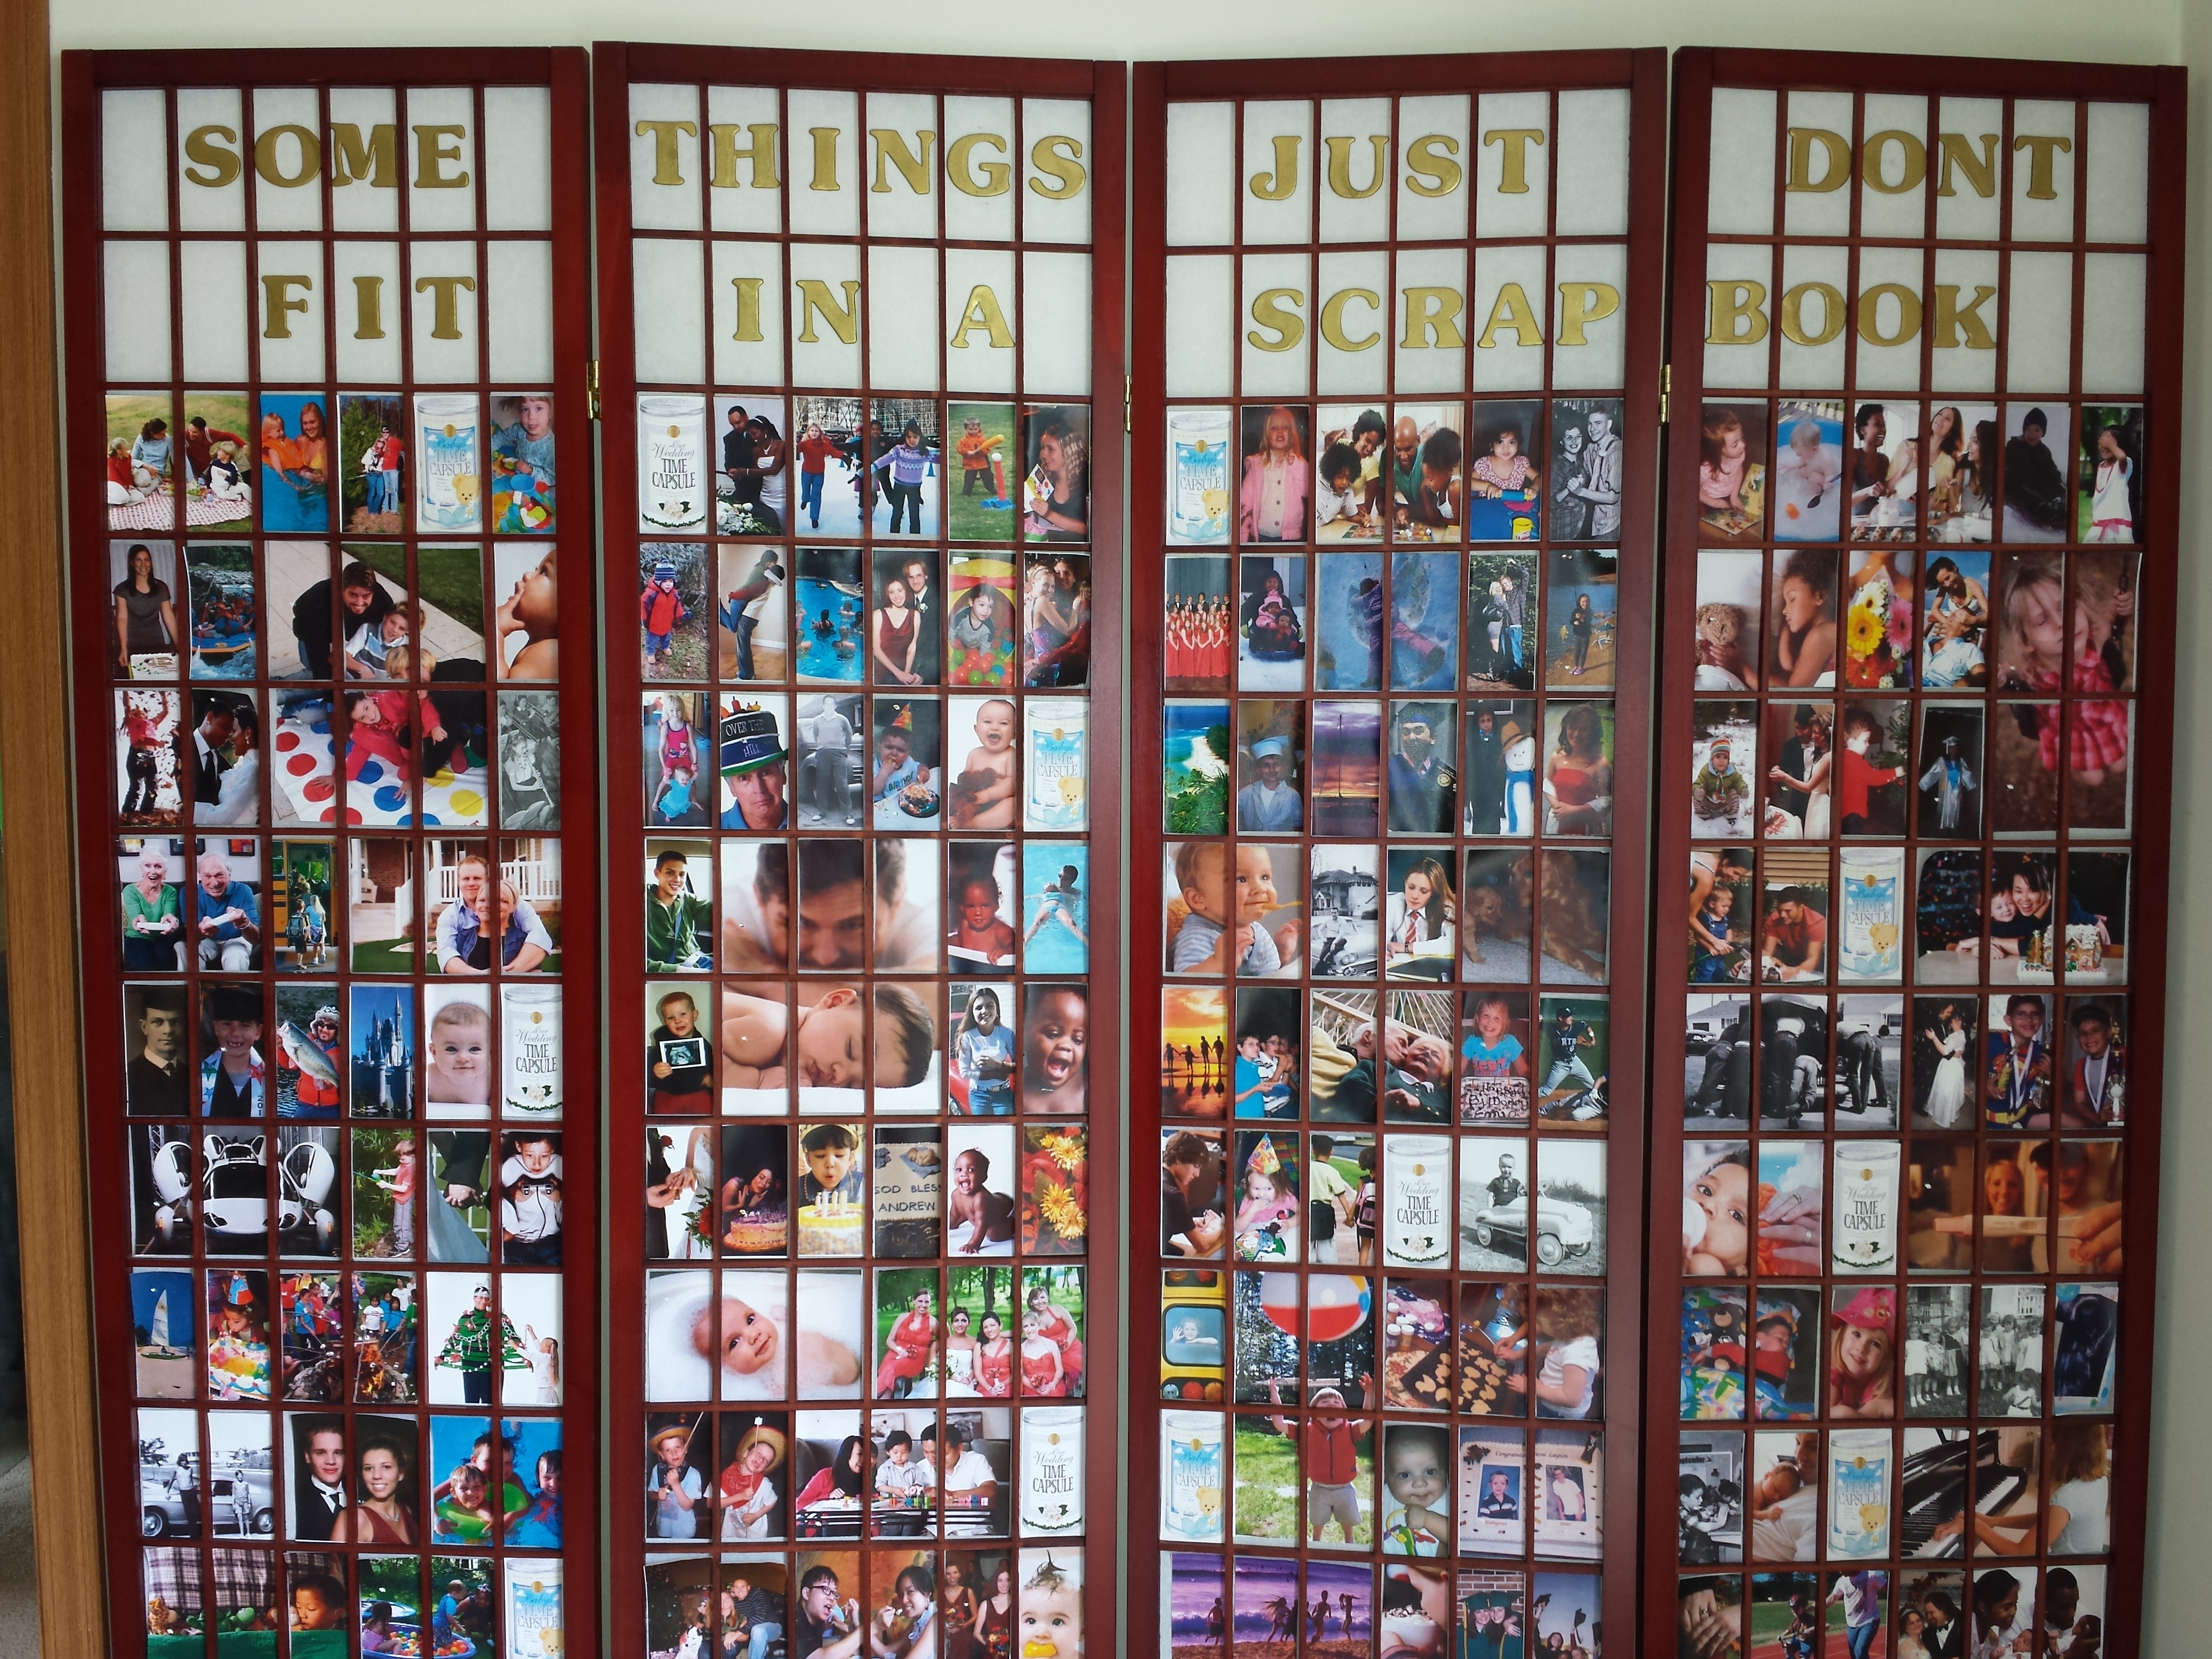
3. Measure your squares on your folding screen, to make sure you print out some photos exactly the size of the individual squares. Make sure you measure the inside the square space. You can make some photos bigger (to take up the space of 4 total squares, for example), but will have to measure where to cut the photo up to fit in each square proportionally, to make it look like a larger photo from a distance. Comment below if you still have questions about this process.
4. Print out your photos, and use your table or a large floor space, to spread them out in the design you would like to see them on your wall divider, when you are finished.
5. (Optional) Leave space or rows of squares, at the top of the wall divider, to use the stencil letters for your special saying. Our saying was, “Some Things Just Don’t Fit in a Scrapbook.” That is our saying, because you cannot save your Baby’s favorite toy, or honeymoon souvenir in your scrapbook and close the page, which is why our Baby or Wedding Time Capsule solves that problem. We challenge you to pick a saying that sums up your family or maybe a short life motto.
6. Use spray adhesive, to spray glue on the back of each photo, and then press the photo into the square you want it on the wall or room divider, making sure it sticks to the screen mesh part. If you are making a saying at the top, use the colored spray paint to paint the letters first. Let them dry, then flip them over and spray each letter with the spray glue, then place in order for your saying at the top of the wall divider. Maybe it is a funny family saying, you always hear in your house. Make it creative, memorable, and most importantly fun.
7. Let everything dry, adding touch up glue on corners where needed. Display in a favorite area of your home and make sure to take a picture of your finished project to save in your scrapbook or time capsule, to remember years later your fun family bonding projects.
We all have milestone moments in our lives. Share them with family and friends in this beautiful display of art work. It is like a time capsule photo collage. What favorite photo would you put on your wall? Share in the comments below.
Making Milestone Moments Count,
– Marcie
www.timecapsule.com